If you have 20/20 vision or are still wondering why your parents have reading glasses, count yourself lucky. But if you’re like many people—over 60 percent of the population by some estimates, including most people over 45—reading the tiny text on your iPhone or iPad screen might be impossible if you don’t happen to have the right pair of glasses handy.
What we really want is a screen that corrects automatically for its user’s individual vision problems—research into such technology has taken place at UC Berkeley and the MIT Media Lab, but real-world products are probably years off. Until then, those of us who need a little help seeing our screens will have to rely on features Apple has built into iOS. Try these options:
Increase Text Size
Although not every app supports it, Apple has a technology called Dynamic Type that lets you set your preferred text size. In Settings > Display & Brightness > Text Size, you’ll find a text size slider, and you can see how it affects text in the iOS interface by moving around in the Settings app or looking at Mail.
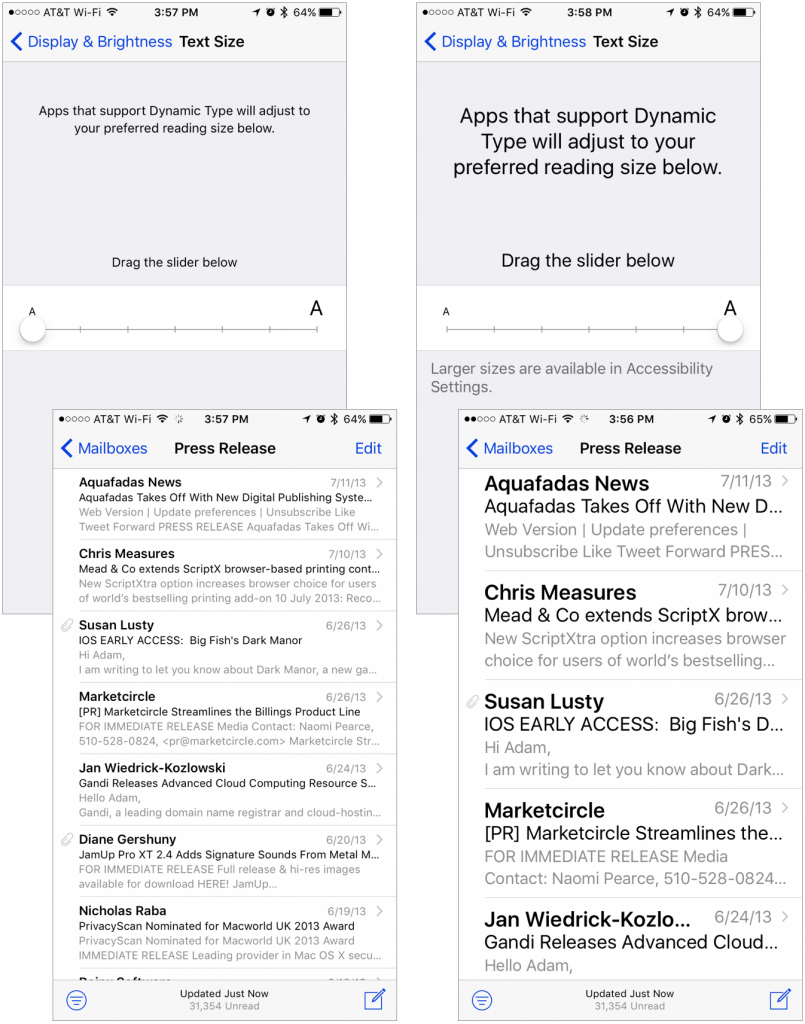
If you want a size even larger than is available from the Text Sizes screen, you can get that in Settings > General > Accessibility > Larger Text. Turn on Larger Accessibility Sizes, and the size slider adds more options.
Bold Text
Sometimes, the problem isn’t so much the size of the text, but how light it can be. In Settings > Display & Brightness, there’s a switch for Bold Text. Turn this on, and all the text on the iPhone will become darker. Oddly, enabling Bold Text requires restarting your device, but there’s no harm in doing that.
Display Zoom
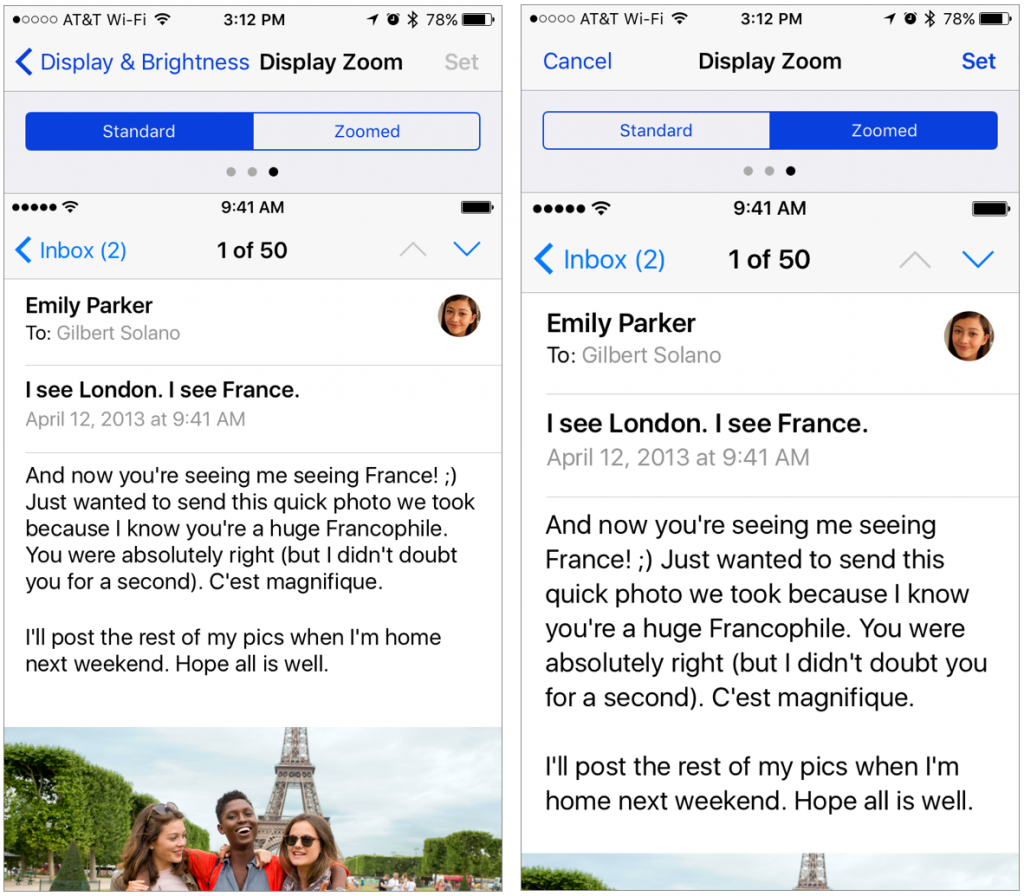
If you have difficulty with aspects of the screen other than text, you can use iOS’s Display Zoom feature to expand everything by a bit. The trade-off is that you’ll see less content on the screen at once, of course, but that’s a small price to pay if it makes your iPhone easier to use.
To enable Display Zoom, go to Settings > Display & Brightness > View. Once there, you can compare the difference between the standard and zoomed views in three sample screens by tapping the Standard and Zoomed buttons at the top—notably, you’ll lose a row of icons on the Home screen. If you think zoomed view might be better, tap Zoomed and then tap Set. Your iPhone has to restart, but it’s quick. Unfortunately, if you decide to switch back to standard view, you’ll need to rearrange your Home screen icons again.
Zoom
The iPhone’s full Zoom feature is particularly useful in two situations. First, it’s easy to invoke and dismiss if you need a quick glance while wearing the wrong pair of glasses. Second, if Display Zoom doesn’t magnify the screen as much as you need, the full zoom may do the job.
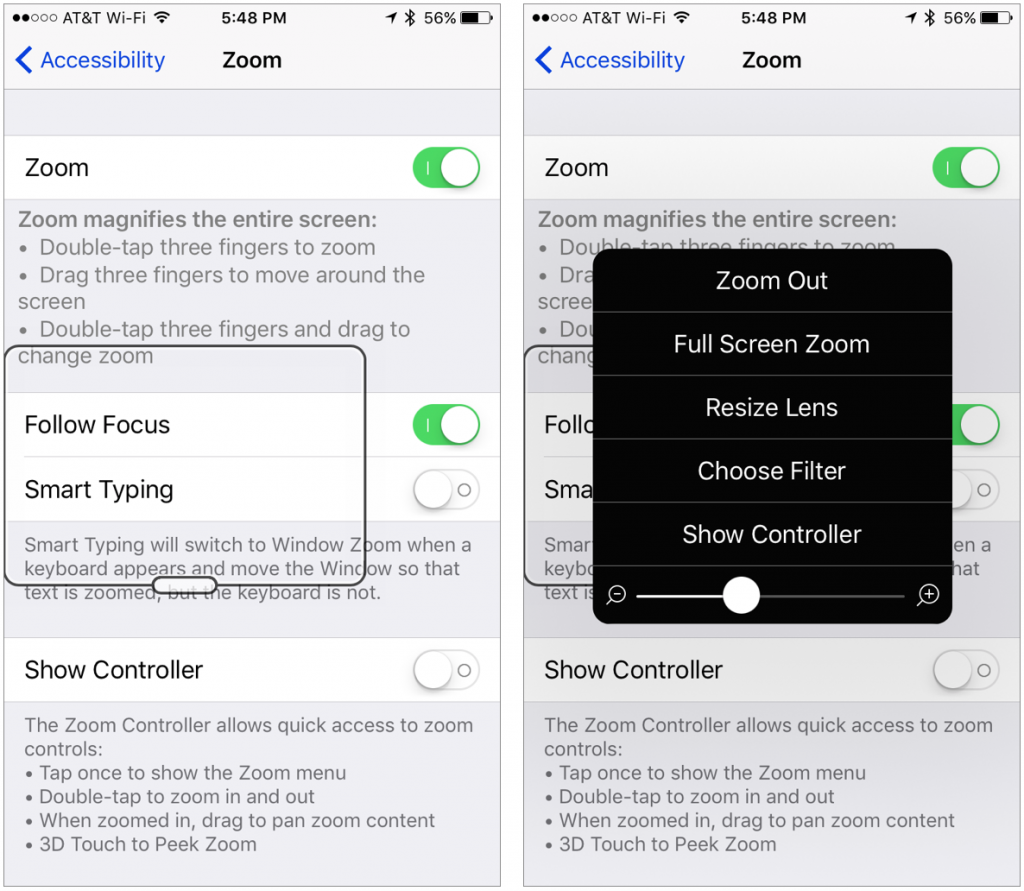
Turn it on in Settings > General > Accessibility > Zoom and zoom in by double-tapping the screen with three fingers. By default, the Zoom Region is set to Window Zoom, which gives you a magnifying lens that you can move around the screen by dragging its handle on the bottom.
Tap the handle to bring up a menu that lets you zoom out, switch to full-screen zoom (which can be harder to navigate), resize the lens, filter what you see in the lens (such as grayscale), display a controller for moving the lens, and change the zoom level. To get back to normal view, just double-tap with three fingers again.
So, if you want to be able to use your iPhone more easily when your reading glasses aren’t handy, try the features described above and find the right mix for your eyes.

